
I understand that it isn’t always viable—especially for small businesses—to hire a professional designer for every piece of design work. You’ll probably work with a professional for the really critical projects—brand identity, website design and key marketing materials—but for things like social media, where you need to create weekly (sometimes daily) content, it can make sense to DIY.
Canva makes it easy for anyone to create graphics, but without some basic design knowledge it’s easy to produce visuals that feel messy or unprofessional. These Canva design tips will help small business owners create cleaner, more effective graphics for social media, marketing, and everyday business use.
The great thing about Canva is that it has opened design up to everyone. Anyone can try being a designer, which is great for accessibility when you consider the heavy subscription costs professionals pay for Adobe programs every month. The tools are more limited and the output quality isn’t as high as a result, but for entry-level design it’s actually pretty decent. I think for social media it’s perfect: quickly consumed content with lower value and high turnover, such as Instagram, LinkedIn and Pinterest.
The problem with using Canva is this: if you don’t understand the principles of design, your creations will likely feel off. Or worse; badly designed graphics can cause your audience to disconnect from your brand as you appear unprofessional and therefore untrustworthy.
It’s a bit like how anyone can go to B&Q, buy a power drill, watch a YouTube video, and attempt their own garage conversion. You might make a good attempt at something that resembles wiring, plumbing, and plastering, and your partner will say “It’ll do!” but problems will likely arise. Without the fundamental knowledge and experience of working in the industry every day, you simply won’t know how to solve those issues with the efficiency and care that a professional tradesperson would.
Here are some helpful pointers from many years of graphic design experience to help you create more professional visuals using Canva—designs that will help your brand grow rather than leaving you, and your audience, with that “something is off” feeling.
1. Avoid Overusing Canva Templates
Make a set of templates from scratch in line with your own unique brand style or you can almost guarantee you will immediately go off-brand, distracted by what is already pre-made. It might take a little while to setup but then you can use over and over again. You can do this by looking at your website and printed materials and reflecting that same style back into your templates. The exception is the blank templates which are pre-sized to fit certain projects (e.g. Instagram Post 4:5) – these are super useful.
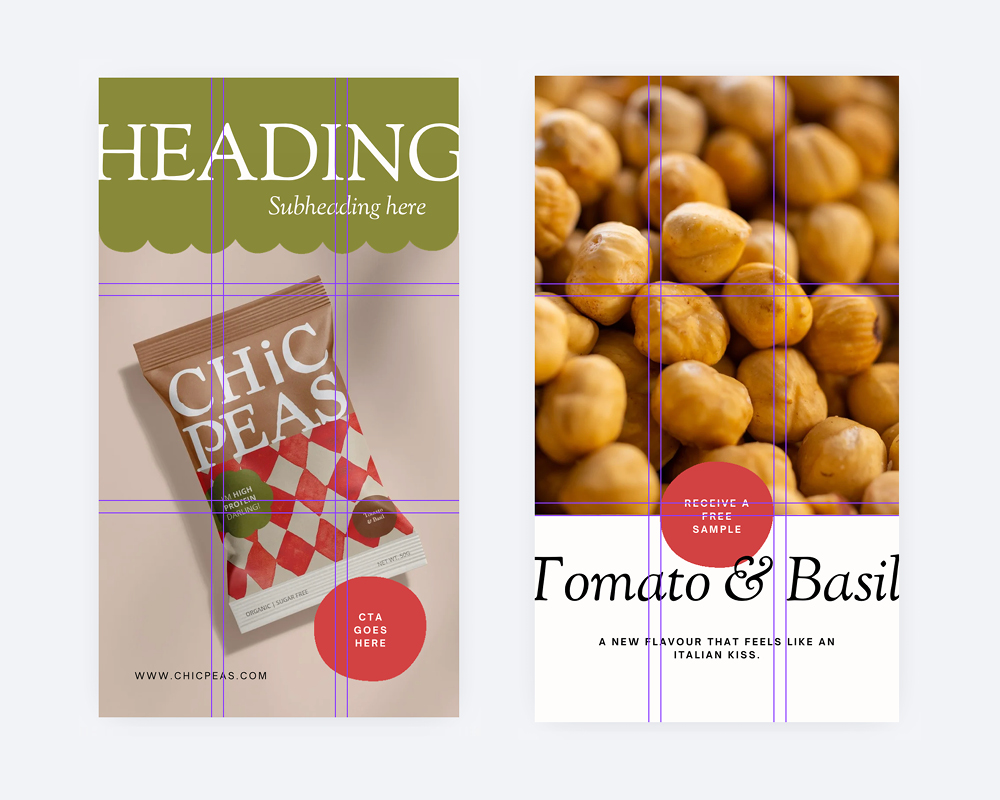
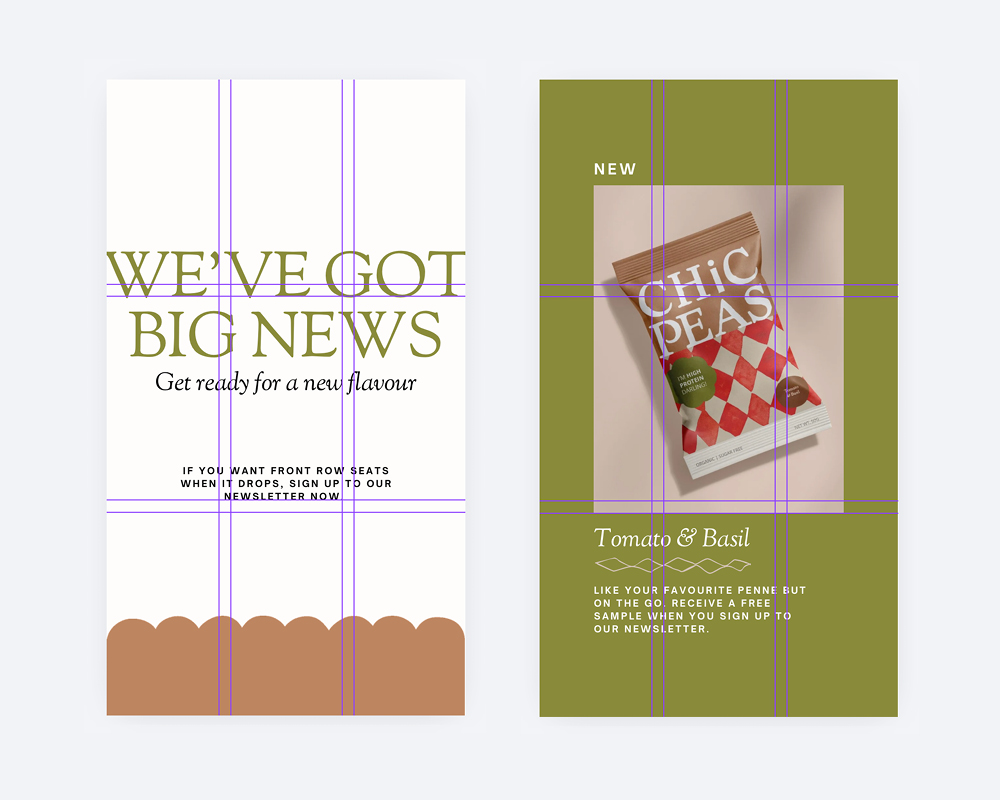
2. Add grid systems
A staple of design composition theory, grid systems help you build designs that have pleasing balance and good structure. To create a grid go to File > Settings > Add Guides. There are some preset grids or you can create a custom one depending on your file shape and size. Always work within margins; these are crucial to give breathing room at the edge of your artwork. You can switch these on and off (File > Settings > Show margins) and when you move elements around you’ll see they appear to let you ‘snap’ objects in place. Use your grid system to determine the shape and size of individual elements and align different elements together – this stops your design from becoming random and helps to achieve balance.
3. Create visual hierarchy
Without hierarchy, your visual communication fails. When everything is all one size, shape, alignment, colour, texture… nothing stands out. A really common mistake is making all your text AS BIG AS POSSIBLE. You think that this means that all your messages will get read. What in fact happens is that none of your messages are absorbed because they are all fighting against each other. Pick the most important elements and scale them up. Pick the least important, or longer reads and scale them down. Same goes for colour – not everything needs to be a colour pop. Using neutral colours in a majority of your space will help what’s really important to stand out.
4. Use Alignment
Alignment is a cool trick to make your design look instantly clean and tidy. You can select individual elements or multiple ones (SHIFT click) then go to ‘Position’ on your top tool bar. Under ‘Arrange’ you’ll find ‘Align Elements’, select the option which suits. Individual elements will auto align to the whole page where as multiple elements will all align in relation to each other. When you have three or more elements that need even spacing an option appears to ‘tidy up’ which is really useful for setting the space between each object exactly the same.
5. Follow your own brand guidelines
Don’t start using a different font because it’s Friday and you’re feeling fun. Don’t change colours because you saw a competitor use them and you thought they really ‘popped’. Definitely do not make a whole new layout concept because your aunty/cousin/girlfriend saw something they love and thinks you ‘just need a little change’. Your branding is yours for a reason, remember the strategy behind it. Remember why it connects your business and your audience together. If you constantly change how you look, you won’t be recognisable. It will erode the trust of your customers and hinder your business growth. Adding your logos, fonts and colours into the Brand Kit section helps this urge if you’re on the Pro version of Canva.
6. Don’t use everything, everywhere all at once
Just because your brand tool kit includes 7 colours, 4 fonts and 16 illustrations, doesn’t mean you need to include them all on every single design. This is called refinement. You look at all the things you have to work with and then make a selection of just a few that curate well together. This avoids over cluttering your space and creating visual chaos. You want to use enough that it still looks like your brand but scaled back to a minimum amount of elements will create a much more professional, modern style.
Still struggling with design for social media?
Canva Design Tips FAQ
Is Canva good enough for professional design?
For everyday marketing materials like social media graphics, Canva is often more than good enough. However, for complex projects like branding systems, websites, or print design, professional tools such as Adobe Illustrator and Adobe InDesign usually offer far more control and higher quality outputs.
Why do my Canva designs look unprofessional?
Most of the time it’s because of missing design fundamentals—things like alignment, hierarchy, spacing, and colour balance.
Should businesses rely only on Canva?
Canva is great for quick marketing assets, but businesses should still work with professional designers for brand identity and key marketing materials.